How to Replace Windows and Doors Step by Step
Replacing windows and doors is more than a cosmetic upgrade. It affects comfort, drafts, noise, security, and household energy use. The U.S. Department of Energy’s Energy Saver guidance estimates that windows account for about 25%–30% of residential heating and cooling energy use. That figure is a useful reason to inspect older units, though actual savings depend on climate, installation quality, and the home itself. No product fixes every problem.
This step-by-step guide explains how to replace windows and doors, from checking the opening and taking careful measurements to removing the old unit, preparing the frame, and sealing the new installation. It also covers tools, safety precautions, flashing, insulation, and final operation checks. Small details matter: a level on the sill, a tape measure checked twice, and a narrow gap filled correctly can affect how well a unit performs. Follow the manufacturer’s instructions and local building requirements, and bring in a qualified installer when the opening is damaged or the work exceeds your experience. Even careful DIY work can miss something. Recheck the fit before fastening, and test each sash, lock, and door swing before finishing the trim.
Assess the Existing Windows and Doors and Measure Each Opening
Before ordering replacements, inspect each window and door from both sides. Look for soft wood, cracked glass, loose hinges, water stains, and gaps around the trim. Press gently near the sill and lower corners; softened material can signal hidden moisture damage. Note whether each unit sticks, rattles, or leaks during rain. Small clues matter. A photo of each opening, including its hardware and surrounding trim, can help you compare conditions later. Do not assume every opening is identical, even in the same room.
Measure each unit carefully, and write down the location beside every result. For windows, record the inside width at the top, middle, and bottom, then the height at both sides and the center. For doors, measure width at the top, middle, and bottom, plus height on both sides. Use the smallest relevant measurement as a cautious reference, but confirm the supplier’s measurement method before ordering. Some require the existing frame size; others ask for the rough opening. Keep the tape level and note whether trim or a threshold affects your readings. Measure twice. I might still miss a slight bow in an old frame, so unusual or inconsistent measurements deserve a second look before anything is purchased.
Select Replacement Units and Prepare the Required Tools and Materials
Choosing replacement windows and doors starts with careful measurements, not appearance alone. Measure each opening at the top, middle, and bottom, then compare the results. For many projects, the smallest measurement helps prevent ordering a unit that will not fit. Check the existing frame for rot, moisture damage, or loose sections. A replacement unit may suit a sound frame, while a damaged frame can require more extensive work. Confirm the unit’s operating style, dimensions, and installation requirements before ordering. It is easy to trust one measurement. That is where errors begin.
Tips: Write measurements on a sketch and label each opening. Check door swing, handle location, and clearance for nearby walls or furniture. Small details matter.
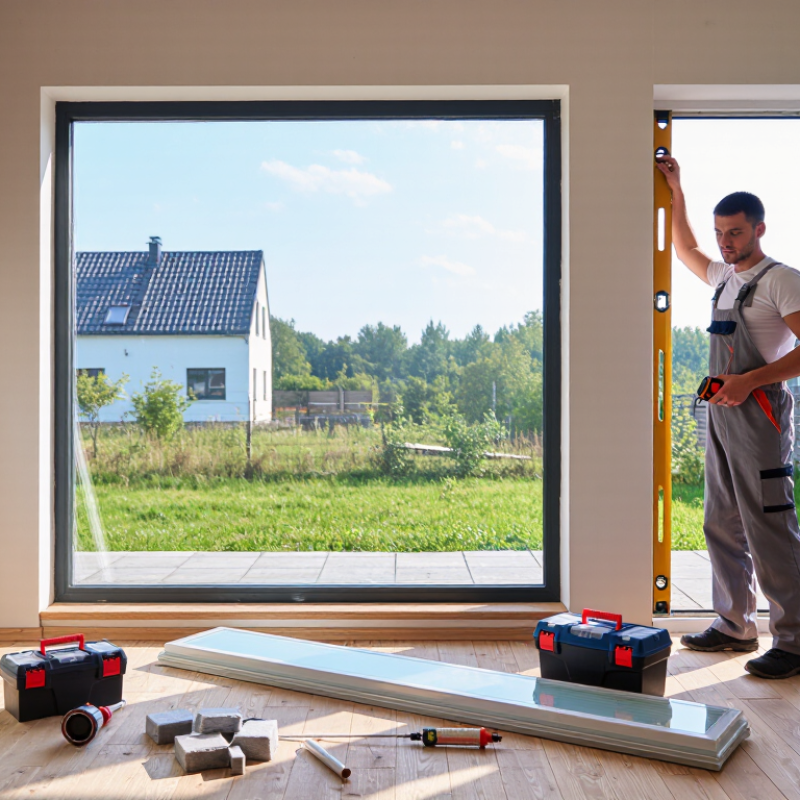
Gather a tape measure, level, square, pry bar, utility knife, drill, and suitable fasteners. Keep shims, low-expansion window-and-door foam, exterior sealant, and protective gloves nearby. Follow the unit’s installation instructions; materials and fastening points can vary. Protect floors and set aside a clear work area. Have a helper available for lifting large units. Recheck your tool list before removing anything. A missing level can slow the job, and rushing measurements is rarely worth the time saved.
Replacement Windows and Doors: Preparation Time by Step
These illustrative planning estimates show time for measuring openings, selecting replacement units, gathering tools and materials, and protecting the work area. Actual time varies with the number of openings, product choices, and site conditions.
Remove the Old Windows and Doors Without Damaging the Surrounding Structure
Score the paint and caulk around each frame before removing trim. Use a thin putty knife and a small pry bar, working against a wood shim rather than the wall. Remove window sashes or the door panel first; their weight can twist the opening. Support the frame, then cut nails or screws with a short, controlled saw cut. Keep the blade shallow. Avoid cutting into siding, sheathing, or the rough-opening studs. For a door, remove hinge pins or screws and have someone steady the panel. Work slowly. If the frame will not move, find the hidden fastener instead of forcing it.
The U.S. Environmental Protection Agency estimated that 600 million tons of construction and demolition debris were generated in 2018, with nearly 90 percent associated with demolition activities (EPA, “Advancing Sustainable Materials Management: 2018 Fact Sheet”).
Careful removal helps keep reusable materials intact and limits damage that could add repair work. Watch for flashing, insulation, and damp or softened wood behind the casing. Stop if the opening shifts or the wall surface begins to crack. Older painted trim may warrant a qualified assessment before disturbance. No hard prying. A little damage is easy to dismiss in the moment, but even a torn flashing edge can invite water later.
Install and Secure the New Windows and Doors in Their Openings
Set the new unit into the opening with help; large windows can twist during handling. Center it, then place shims near corners and fastening points. Check the sill for level and the frame for plumb and square. Keep it square. Drive fasteners only where the manufacturer specifies, and avoid overtightening. A bowed jamb can make a sash stick or leave uneven gaps. Open and close the unit before sealing it.
ASTM International’s E2112 practice covers installation of exterior windows and doors, including flashing and water management. Follow the unit’s instructions and local construction requirements; details vary with wall type. Fold flashing in shingle fashion, so water drains outward, not behind the cladding. Fill the perimeter gap with low-expansion foam or suitable backer rod and sealant. Do not pack the cavity tightly. The U.S. Department of Energy notes that air leaks can waste 10–20% of heating and cooling energy, making a continuous, careful seal worthwhile. Still, foam alone is not a substitute for proper flashing. I would recheck the reveal after fastening; that small pause can catch a frame pulled out of square.
Seal the Frames and Check Alignment, Operation, and Weatherproofing
After setting a replacement window or door, check the frame before sealing it. Use a level and square, then compare diagonal measurements; uneven diagonals can signal a twisted opening. Open and close the unit several times. It should move smoothly, without scraping or springing back. A narrow, consistent gap is easier to weatherproof than a frame forced into position.
Fill the frame gap with backer rod and low-expansion window-and-door foam, applied in modest passes. Too much foam can bow jambs and spoil operation. Keep sill drainage paths and weep openings clear. The U.S. Department of Energy’s Energy Saver guidance estimates that windows account for 25–30% of residential heating and cooling energy use, making careful air sealing worthwhile. Don’t seal what must drain.
Add compatible exterior flashing and sealant, following the window or door maker’s installation instructions. Indoors, inspect the perimeter with a smoke pencil or tissue on a windy day; movement can reveal a missed leak. The U.S. Environmental Protection Agency’s ENERGY STAR guidance estimates that air sealing and insulation can save about 15% on heating and cooling costs, though actual results vary by home. Recheck locks, latches, and weatherstripping after the sealant cures. A rushed final check is easy to regret.